How to Use AI-Generated Maps in Roll20, Foundry, and Owlbear Rodeo
Getting Your Map onto the Table
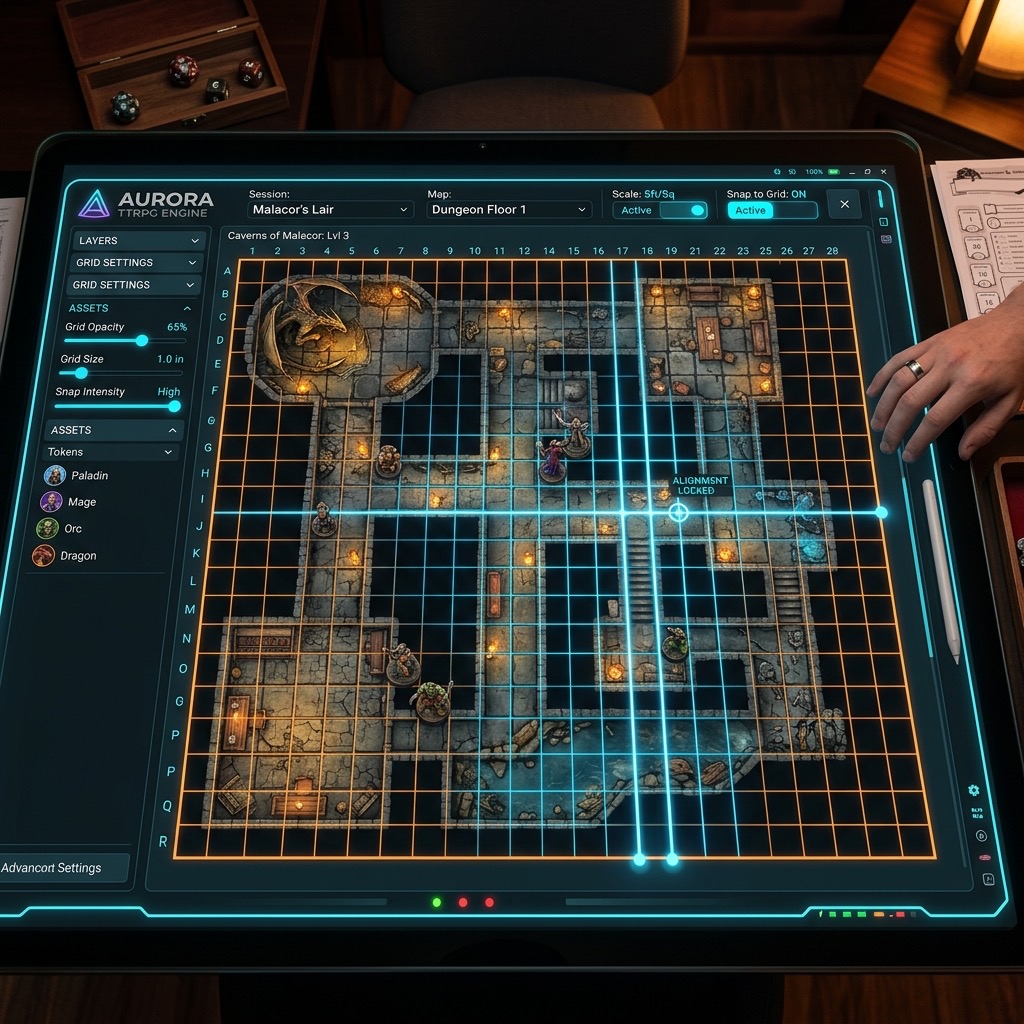
Generating a breathtaking AI battle map is only the first step. To actually run your TTRPG encounter, you need to get that image into your Virtual Tabletop (VTT) and align it with a playable grid.
If you have ever tried to align a map that already has a grid drawn on it, you know how frustrating it can be. If the AI drew the squares even slightly crooked, they will never match up with your VTT's digital grid.
The secret to a stress-free import is starting with a perfectly flat, gridless image. This is exactly why we built Text to Tabletop. Our generator automatically locks the camera to a perfect 90-degree angle and strips out all grid lines, giving you a clean slate that aligns perfectly in any software.
Whether you are running a complex tactical encounter or a simple tavern brawl, here is exactly how to set up your AI-generated maps in the three most popular VTT platforms.
1. Roll20: The Industry Standard
Roll20 is one of the most widely used platforms for online roleplaying games. Its grid alignment tool is powerful but can be finicky if you do not know where to look.
Step-by-Step Import:
- Open your game and navigate to the Page Toolbar at the top of the screen.
- Create a new page and click the gear icon to open the Page Settings.
- Set your desired map width and height (e.g., 25 x 25 units).
- Switch your active layer to the Map Layer.
- Drag and drop your AI-generated map from your computer directly onto the Roll20 canvas.
- Right-click the image, select Advanced Transform, and then click Align to Grid.
- The tool will ask you to highlight a 3x3 square area. Trace the space, and Roll20 will automatically scale the image to fit its grid.
2. Foundry VTT: The Power User's Choice
Foundry VTT offers incredible customization, dynamic lighting, and automation. Setting up a map here is heavily tied to creating a new scene.
Step-by-Step Import:
- Navigate to the Scenes Directory (the folded map icon on the right sidebar) and click Create Scene.
- Give your scene a name and click on the Background Image file path button.
- Upload your AI map to your Foundry user data folder and select it.
- Foundry will automatically detect the image dimensions.
- Go to the Grid tab within the scene settings.
- Because your Text to Tabletop map is completely gridless, you do not need to worry about the Background Image Scale fighting with printed lines. Simply adjust the Grid Size (usually between 100 and 150 pixels) until the squares look appropriately sized for your encounter.
- Click Save Changes and activate the scene.
3. Owlbear Rodeo: Fast and Simple
Owlbear Rodeo is beloved for its lightweight, no-frills approach to TTRPG mapping. If you need to throw a map on the screen in two minutes, this is the tool for the job.
Step-by-Step Import:
- Open your Owlbear Rodeo room and click the + (Add) button in the bottom right corner.
- Select Map and upload your generated image.
- Once uploaded, drag the map onto the canvas.
- A context menu will appear when you select the map. Click the Edit (pencil) icon.
- Here, you can define the exact number of columns and rows for the grid. Because your image is completely flat and gridless, simply type in the dimensions you want (like 20x20), and Owlbear Rodeo will perfectly snap its digital grid over the art.
- Lock the map in place, and you are ready to play.
The Ultimate Setup Hack
The biggest hurdle in VTT prep is fighting against wonky perspectives and baked-in grid lines. By starting with a perfectly clean, top-down asset, you save yourself hours of tweaking and resizing.
If you are tired of wrestling with map alignment, try Text to Tabletop today. Generate your perfect, gridless encounter setting in seconds, drop it into your favorite VTT, and get right back to the game.
Tyler V
Lead Developer and UX Designer at Text to Tabletop. Passionate about helping GMs and players create better TTRPG experiences.